 |

Build a humidity chamber as a model of the water cycle
|
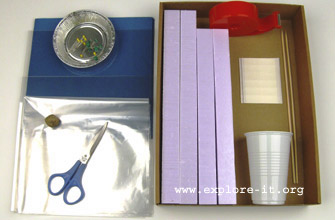 |
Material
- Bottom of a cardboard box
- 4 plastic sheets
- 8 rigid hard foam rods
- 2 sheets of plastic film
- 2 napkins
- plastic cups and aluminium dishes
- 2 wooden skewers
- double-sided tape
- pins (short and long) and 1 stone
|
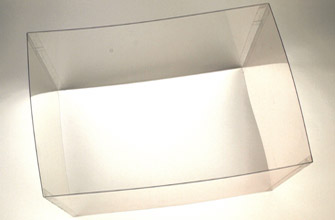 |
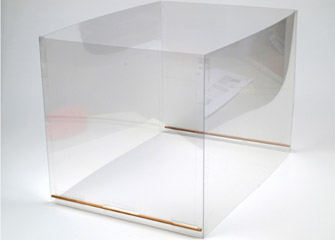
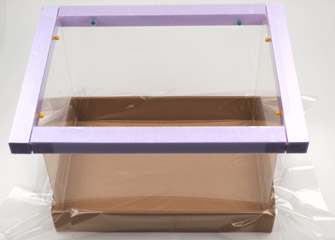
Build the side walls of the chamber
- Lay the 4 plastic sheets next to each other and connect them along the entire edge using the double sided tape.
- This will create a chamber 29 cm long, 21 cm wide and 21 cm high.
|
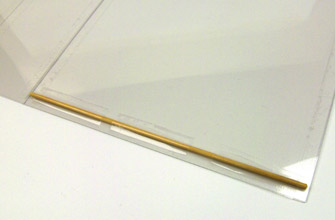 |
- Fix a wooden skewer at a distance of 1 cm to the bottom edge of the shorter sides.
|
 |
- The wooden skewers make the side walls of the chamber more stable.
|
 |
Construction and installation of the frame
- Lay out the two longer and two shorter hard foam rods flat (not upright) to form two frames.
- Important! The two longer foam rods must lie inside the two shorter ones (see diagram!).
- Use the double sided tape to fix the foam rods together at the corners.
|
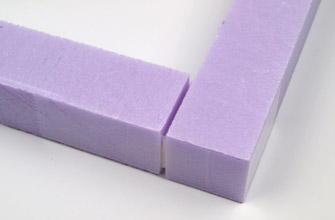 |
- The corners must fit together exactly!
- Strengthen the corners with more tape on the outside.
|
 |
- Now fix one of the frames around the side walls of the chamber, flush with the top edge.
- Hold the frame in place with two short pins on each side.
|
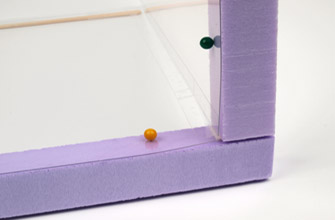 |
- Push the short pins through the plastic sheets and through as far as it will go into the foam frame.
- The second frame will be used later.
|
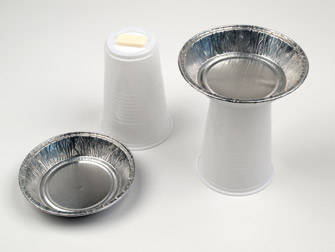 |
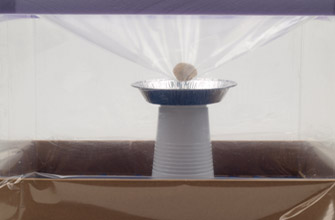
Constructing a "reservoir" in the "mountains"
- Fix the aluminium dish onto an upturned plastic cup using two pieces of double sided tape placed on top of one another.
The aluminium dish symbolises the reservoir and the upturned plastic cup represents the mountains.
|
 |
Assembling the humidity chamber
- Lay a sheet of plastic film over the bottom of the cardboard box.
|
 |
- Place the "chamber" into the bottom of the cardboard box by gently pushing the side walls together with the plastic film down until they are resting on the base of the cardboard.
Careful! The plastic film must not be ripped during this process.
|
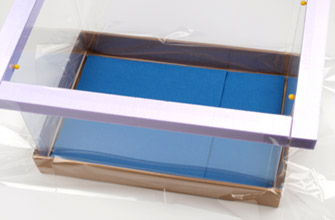 |
- Lay the two napkins on top of the plastic film.
|
 |
- Soak the napkins evenly with two cups of water.
The soaked napkins symbolise a large lake or sea.
|
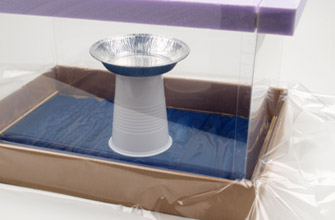 |
- Place the "mountain" with the "reservoir" in the middle of the "sea."
|
 |
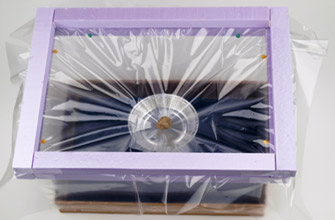
- Lay the second plastic film evenly over the chamber frame.
|
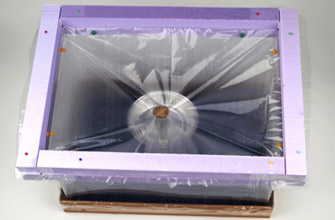 |
- Lay the second frame flush with the first frame on top of the plastic film.
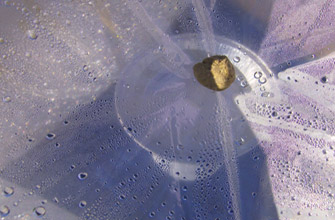
- Now carefully lay the stone in the middle of the film.
|
 |
- Important: It's very important that the stone comes to rest just above the "reservoir", precisely in the middle of the aluminium dish.
|
 |
- When the stone is in place, fix the two frames in place with the long pins.
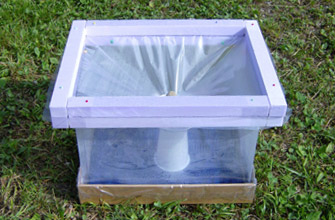
- Your humidity chamber is now ready for the experiment!
|
|
|
The experiment
- Place your humidity chamber somewhere where it gets as much sun as possible during the day.
|
 |
- What changes? What starts happening in the chamber even after a short time?
- Write, draw or photograph your observations regularly without touching the chamber.
|
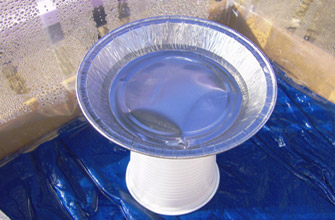 |
- Is it possible that at the end of a sunny day you find water in your "reservoir" that has come from the "sea"?
- How much water is transported from the "sea" to the "reservoir" in the whole class?
(15 humidity chambers cover about a metre squared of the surface of the sea.)
|


